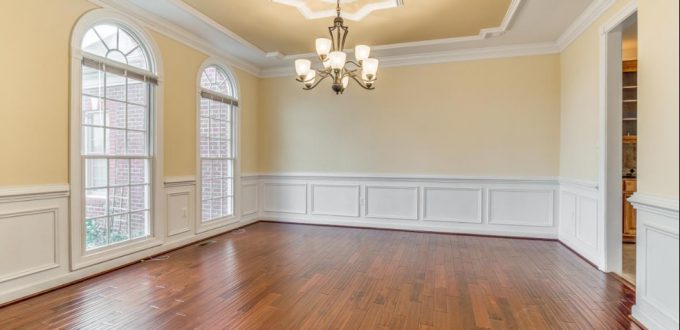
Install Pre finished Hardwood Floors in Your Living Room
Hardwood is the undisputed king of flooring materials when you consider the warmth, beauty, and value added to your home. It has never been so easy to entirely replace or find a match for existing floors thanks to the large range of pre finished hardwood floors now available. These planks and wood strips are often treated with numerous layers of aluminum-oxide-infused polyurethane that is cured under UV rays, resulting in a very strong finish that will outlast many traditional finishing options. Keep reading to learn more about care and installation of these amazing floors.
One benefit highly valued among homeowners with pre finished hardwood floors is that you can just walk on your floor the day it is installed because there is no dirty sanding or extended drying times for clear topcoats. Also, you can choose from a variety of surface effects and sheens, e.g. a distressed, and old-world look with a hand-scraped finish.
Homeowners on a budget may install prefinished boards in a DIY way, saving money on a professional and achieving beautiful results within a weekend. The flooring is simple to maintain once installed, requiring only routine cleaning and periodic clear coat touch-ups. If the surface begins to seem worn, it may be quickly restored to like-new condition with minimal effort.
Necessary tools to do DIY installation
If you are interested to install in a DIY way then the following are the necessary tools you need to arrange before you start to save your time and frustration.
• Wood chisel
• Utility knife
• Table saw
• Stapler
• Shop vacuum
• Putty knife
• Miter saw
• Knee pads
• Jigsaw
• Hearing protection
• Handsaw
• Framing square
• Cordless drill
• Chalk line
• Brad nail gun
• Air hose
• Air compressor
Materials needed for this project
Better avoid your last-minute trips shopping by arranging all the materials before you start your project. The following is the list.
• Transition pieces
• Rosin paper
• Painter’s tape
• Narrow crown staples
• Glue
• Natural hardwood flooring or Engineered wood flooring
Since pre finished hardwood floors are not able to be sanded to correct floating gaps or elevation discrepancies like regular unfinished hardwood floors, this flooring needs to be securely fit and also flat to work. The following are the steps for completing the installation project.
1. Get the room ready
• Ensure existing floor/subfloor is solid underfoot
• Ensure the plywood edges meet smoothly
• If you have got doors between rooms, cut the casing and jambs bottoms with a certain block of flooring
• Cover the subfloor.
2. Start along with the straightest wall
Determine the flooring’s direction of travel. Planks going in the longer direction look best in hallways. Some manufacturers advocate putting the flooring perpendicular to the joists’ direction, but if your subfloor is solid 34″ thick subfloor, either way, is good.
3. Fitting special spots
In older homes, you may find heating vents on the floor and also along the walls, as well as radiators. Cutting around floor registers is simple. Simply take measurements of the bottom of your register to ensure that the opening is the correct size.
4. Reversing direction
You may easily continue with the flooring into another room through a doorway, but if you like to go in the reverse direction, buy or manufacture your own tongue-to-glue into the groove.
5. Finishing touches
Nail your baseboard back to place and also cut the base shoe for fitting after your flooring is finished. Use matching putty to fill in the nail holes. Only nail the baseboard and base shoe into your wall studs, not the flooring.
At REALGOODS Company we source many varieties of solid hardwood flooring, engineered hardwood flooring, pre finished hardwood floors, and unfinished hardwood flooring. We pride ourselves on excellent customer service, expertise. and quality products Give us a call today to see your hardwood flooring vision turned into a reality for you and future generations.
